So it begins
I've finally started the embroidery (other than the birds) on the Cersei gown!
First I printed out photos that had good shots of the 5 embroideries: center back, right breast, right lower sleeve, left upper arm and left lower sleeve. I traced around one of my existing birds and sketched out the major swirls. Then I used a light box to retrace it more cleanly in sharpie. And ended up with a drawing like this for each section:
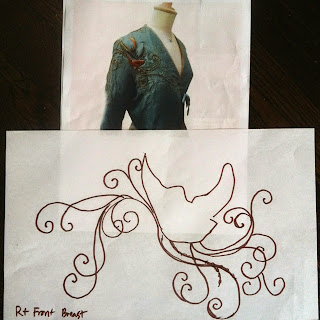
I held each motif up to the pinned together dress to make sure the scale was right. Then I put a piece of transfer paper under the design and traced the drawing onto the fabric. I redrew a few fainter lines then hooped my fabric.
The swirls seem to be of 3 types to me - a metallic embroidery running stitch, a running stitch with seed beads, swirls of seed beads and Italian mesh couched with a herringbone stitch with seed beads on top. I started with some of the easier bits and worked my way up to the herringbone stitch.
One thing I like about this is I can add more later to make it even richer but I don't really have to. And while I want to stay with the basic shapes and placement of the swirls I can be a little free in exactly where I place things.
Here's a photo from early on with one of the birds placed on top :
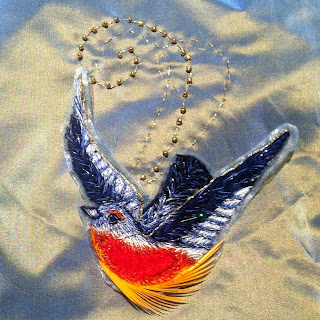
and here's what I've gotten done so far: (Please ignore the post-hoop wrinkles!)

Hello! I actually started this few months ago, but I had trouble with the birds! I am so glad I found your blog! It really helps. I do have a question, how were you able to stick the feathers on there? My first bird, I used fabric glue however I was having issues with it. What kind of feathers worked for the orange part and how did you attach it?
ReplyDeleteI was too nervous about damaging my embroidery to use glue so I sewed the feathers onto the back of my bird then attached the bird to the gown. The orange feathers I got are called goose biot.
DeleteI'd love to see your gown too!